

Is your Dyson vacuum cutting out mid-clean, refusing to charge, or flashing error lights that make no sense? You are not alone. Thousands of Dyson owners face the same battery issues every year, and most assume the worst. The truth is, a proper Dyson vacuum battery reset solves the majority of these problems in under 10 minutes, without tools, without service fees, and without replacing perfectly good hardware.
This guide breaks down everything you need to know, from the standard 30-second reset to model-specific procedures for the V7, V8, V10, V11, and V15. You will also learn how to read indicator lights, clean charging contacts, recalibrate the battery, and recognize when a replacement is actually needed. Every step comes from Dyson’s technical documentation and verified user reports.
Standard Battery Reset Steps
Start here. This universal procedure clears temporary faults, resets the battery management system, and resolves most charging or power issues across all Dyson cordless models.
Remove the Battery and Power Down
Turn off your vacuum completely. Locate the battery release, which is usually a red or gray push-button at the base of the handle, or a slide latch directly on the battery pack. Press and hold the release, then slide the battery out in one smooth motion. Set it on a dry, non-conductive surface such as a wooden table or countertop. This step cuts all power to the vacuum’s internal circuitry.
Wait 30 Seconds to 10 Minutes
Leave the battery out for at least 30 seconds. This minimum wait allows internal capacitors to fully discharge. For persistent problems like error lights that will not clear or charging that will not initiate, extend the wait to 5–10 minutes. Dyson community reports show that batteries left disconnected overnight often resolve issues in vacuums stored for months.
Reinstall and Test Charging
Align the battery with the slot and slide it firmly back in until you hear a click. Plug the charger into a working wall outlet, then connect it to the vacuum. Watch the indicator light closely:
- Solid blue or white: Charging normally
- No light: Charger issue or reset incomplete
- Flashing light: Move to the hard reset below
Turn the vacuum on. If it powers up and holds a charge, the standard reset worked.
Perform a Hard Reset for Stubborn Issues
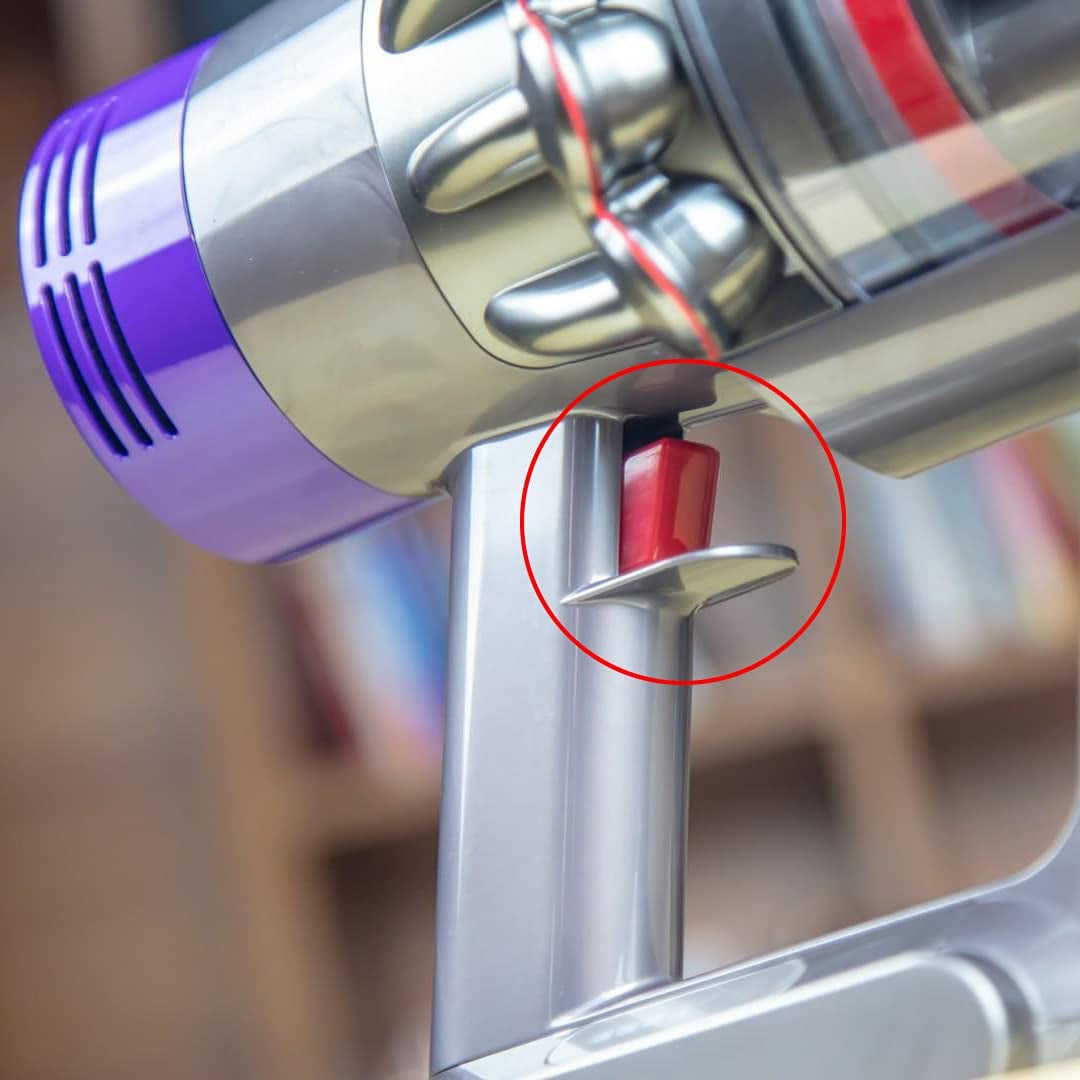
When the standard reset fails, a hard reset fully drains residual power from the system. This step is critical for clearing error codes, recalibrating the battery gauge, and resolving post-replacement setup issues.
Press and Hold the Power Trigger
With the battery still removed, press and hold the power trigger (the on/off button) for 15–30 seconds. You will not see lights or hear sounds. This action drains leftover energy from the vacuum’s capacitors. Many users skip this step, which is why their reset attempts fail.
Wait 5 Minutes Before Reconnecting
After releasing the trigger, wait at least 5 minutes. This ensures the system is fully reset. For older models or vacuums that sat unused for extended periods, extend the wait to 10–15 minutes.
Charge Fully After Reset
Reinstall the battery and connect the charger. Let the vacuum charge uninterrupted for a full cycle, typically 3.5 to 5 hours depending on your model. Do not use the vacuum during this initial charge. A complete charge recalibrates the battery gauge and stabilizes voltage output.
Model-Specific Reset Instructions

While the core process is similar, each Dyson model has unique battery release mechanisms, reset timing, and indicator behavior. Use the correct method for your specific vacuum.
Dyson V7: 10-Second Trigger Hold
Remove the battery using the red push-button release on the handle base. Press and hold the power trigger for 10 seconds. Wait 30 seconds, then reinstall the battery. Charge for 3.5 hours.
Pro tip: Remove and reinsert the filter as well. Clogged filters force the motor to work harder, which mimics battery drain and triggers false error lights.
Dyson V8: Slide-Latch Battery Reset
The V8 uses a slide latch located directly on the battery pack. Slide the latch and remove the battery. Press and hold the trigger for 15 seconds. Wait 1 minute, then reconnect the battery. Charge for 5 hours.
If your V8 has a removable battery door, make sure it clicks fully closed after reinstallation. A loose door can interrupt the electrical connection.
Dyson V10: Check the Temperature Sensor
The V10 battery contains a built-in temperature sensor. If your vacuum overheated, the sensor locks out charging as a safety measure. Remove the battery, hold the trigger for 20 seconds, then let both the battery and vacuum cool to room temperature (15–25°C) before resetting. Charge for 3.5 hours.
Dyson V11 and V15: Use the LCD Diagnostics
These models feature an LCD screen that displays battery status, error codes, and maintenance alerts. Perform a 30-second trigger hold after removing the battery. After reset, the screen should show a charging animation.
If a red “X” or error code appears, update the firmware through the Dyson Link app. Software bugs sometimes cause battery errors that a hardware reset cannot fix.
Interpret Battery Indicator Lights
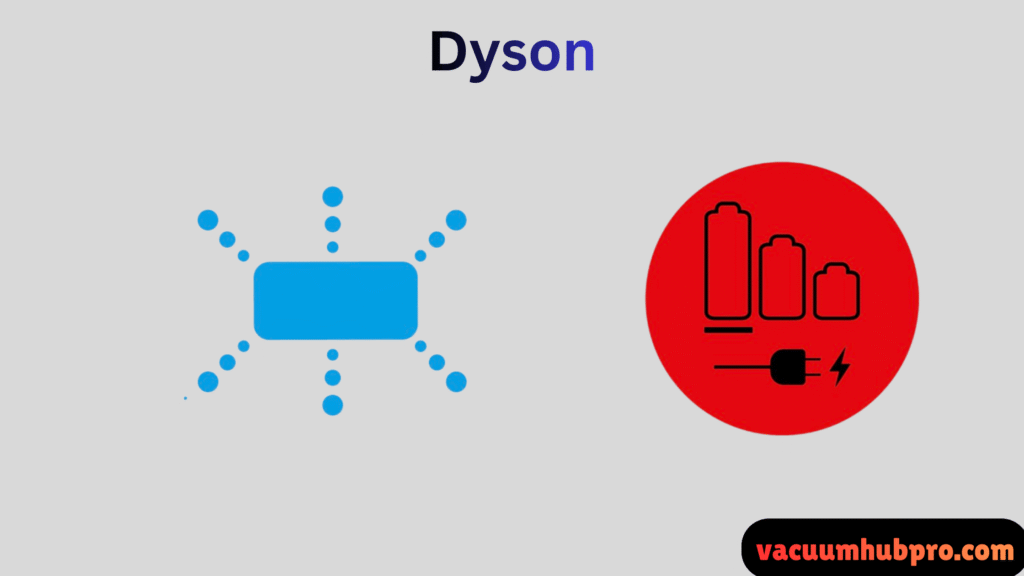
Your Dyson communicates through light patterns. Learning to read them saves time and prevents unnecessary part replacements.
Solid Blue or White Light
The battery is charging normally. If the light stays solid for more than 5 hours, the battery may be fully charged but failing to power on, or the charger is malfunctioning.
Flashing Blue Light
A slow flash usually indicates a battery fault or calibration error. Perform a hard reset. If the flashing continues after two attempts, the battery may need replacement.
Rapid Red Flashing
This signals a temperature issue. The battery is too hot (above 40°C) or too cold (below 5°C). Move the vacuum to a room-temperature environment and wait 1–2 hours before attempting a reset. Never charge a hot battery.
No Light at All
If no light appears when plugged in:
- Test the wall outlet with another device
- Try a different compatible charger
- Clean the charging contacts with a dry cloth
- Inspect the charging port for bent pins
Fix Charging System Issues

Sometimes the battery is fine, and the charging system is the problem. Check these components before assuming the battery is dead.
Reset the Charger
Unplug the charger from both the wall outlet and the vacuum. Wait 30–60 seconds. Plug it back into the wall first, then reconnect to the vacuum. This resets the power supply and clears communication errors between the charger and battery management system.
Clean Charging Contacts
Use a dry microfiber cloth to wipe the metal contacts on the battery terminals, the vacuum’s battery slot, and the charger plug. Dirt, dust, and oxidation block electrical flow. Never use water, alcohol, or cleaning solutions on lithium-ion contacts.
Test with a Spare Charger
If you have access to another Dyson charger, test it on your vacuum. If the vacuum charges normally, your original charger is faulty. Always use the official Dyson charger. Third-party chargers can damage the battery and void your warranty.
Troubleshoot After Reset
If the reset did not solve the problem, do not give up. These additional fixes address the most common post-reset issues.
Battery Drains Too Fast
Recalibrate the battery with a full discharge and recharge cycle:
- Charge the vacuum to 100%
- Use it until the battery is completely empty
- Recharge to 100% without interruption
Repeat this cycle 2–3 times. This process resets the battery’s charge memory and improves runtime accuracy.
Vacuum Shuts Off Mid-Use
This is not always a battery issue. Check these three areas:
- Filters: Wash and dry completely for at least 24 hours. Clogged filters strain the motor.
- Brush bar: Remove hair, threads, and debris. A jammed roller forces the motor to overwork.
- Dust bin: Empty completely and check for blockages in the cyclone and airway.
Intermittent Power
If the vacuum works sometimes but cuts out randomly:
- Ensure the battery is fully seated and locked
- Inspect for bent or corroded contacts
- Switch power modes (Eco vs. Boost) to test trigger responsiveness
If the problem continues, the battery cells may be degrading internally.
Know When to Replace the Battery
A reset cannot fix physical damage or age-related wear. Replace your battery if you notice any of these warning signs.
Swelling or Deformation
A bulging or warped battery is dangerous. Stop using it immediately and store it in a fireproof container until you can recycle it. Lithium-ion cells expand as they degrade and pose a fire risk.
Runtime Below 50% of Original
If your vacuum lasts less than half its original runtime (for example, under 15 minutes on standard mode), the battery has lost significant capacity. This is normal after 500–1,000 charge cycles.
Overheating During Use
Mild warmth is normal. Excessive heat, especially around the battery housing, signals cell degradation. Continued use risks damage to the vacuum’s internal electronics.
Age Over 3–5 Years
Dyson batteries typically last 2–5 years depending on usage. If your battery is older than 3 years and performance has declined, replacement is the most reliable fix.
Maintain Battery Longevity
Proper care extends battery life and prevents future reset scenarios.
Avoid Full Discharges
Do not run the vacuum to 0% regularly. Recharge when the indicator shows 1–2 bars remaining. Deep discharges stress lithium-ion cells and accelerate capacity loss.
Store Properly for Long-Term Use
If you will not use the vacuum for more than a month:
- Charge the battery to 30–50%
- Remove it from the vacuum
- Store in a cool, dry place (15–25°C)
Never store a fully charged or completely empty battery for extended periods.
Use Correct Charging Habits
- Let the vacuum cool for 30 minutes after heavy use before charging
- Unplug the charger once the battery is full
- Charge in a well-ventilated area away from heat sources
When to Contact Dyson Support
If resets fail and your vacuum is under warranty (typically 2 years), reach out to Dyson directly:
- Phone: 800-244-0214
- Online chat: Available at Dyson.com
- Service centers: Use the store locator on Dyson’s website
Before calling, locate your serial number. It appears on a white or silver label on the vacuum body, formatted as three digits, a region code, and additional numbers (for example, 123-AU-A12345). Have your model name, purchase date, and a list of steps already tried ready.
Frequently Asked Questions About Dyson Battery Resets
How long does a Dyson battery last before needing replacement?
Dyson batteries typically last 2–5 years or 500–1,000 charge cycles, depending on usage patterns and maintenance habits.
Will resetting my Dyson battery erase any settings?
No. A battery reset only clears temporary faults in the battery management system. All vacuum settings, filter reminders, and stored preferences remain intact.
Can I use my Dyson vacuum while it is charging?
No. Dyson cordless vacuums cannot operate while connected to the charger. The vacuum must be disconnected to function.
Why is my Dyson battery light flashing blue?
A flashing blue light indicates a battery fault or calibration error. Perform a hard reset. If the flashing continues after two attempts, the battery may need replacement.
How do I know if my Dyson battery is swollen or damaged?
Place the vacuum on a flat surface and inspect the battery housing. If the battery bulges, warps, or does not sit flush, stop using it immediately and arrange for replacement.
What is the operating temperature range for a Dyson battery?
Dyson batteries operate between 0°C and 40°C (32°F to 104°F) and charge between 5°C and 40°C (41°F to 104°F). Charging outside this range triggers thermal protection and prevents charging.
Key Takeaways for Resetting Your Dyson Vacuum Battery
A proper Dyson vacuum battery reset resolves most charging and power issues in under 10 minutes. Start with the standard 30-second reset, then escalate to a hard reset if problems persist. Always check the filter and brush bar before assuming the battery is faulty, as both commonly cause symptoms that mimic battery failure. Use only the official Dyson charger, and store the battery at 30–50% charge if you plan to leave the vacuum unused for extended periods. If your battery is over 3 years old, shows physical swelling, or loses charge rapidly after multiple reset attempts, replacement is the most reliable solution. Contact Dyson support at 800-244-0214 before purchasing a third-party battery, as warranty coverage often includes free replacement for qualifying defects.


