

A twisted, kinked, or stubborn vacuum cord can quickly turn routine cleaning into a frustrating chore. Many homeowners face cords that refuse to retract, bend unevenly, or show visible wear after years of use. Learning how to straighten a vacuum cord the right way protects both your vacuum’s motor and your home’s electrical safety.
This guide covers everything from identifying cord problems to performing safe repairs, resetting retraction mechanisms, and preventing future damage. You’ll find clear steps, tool recommendations, and expert tips to restore your vacuum cord without risking electrical hazards or voiding your warranty.
Spot Cord Problems Before They Get Worse

Look for Visible Physical Damage
Start by examining the entire cord from the wall plug to where it enters the vacuum body. Pay close attention to high-stress zones like the plug connection and the entry point into the machine. Crushed sections, flattened spots, or cracked insulation often signal internal wire damage that prevents smooth operation.
Warning signs requiring immediate action include:
– Burnt spots or discoloration on the insulation
– Melted or deformed sections
– Exposed copper wiring
– Intermittent power that only works when the cord bends a certain way
A cord that powers the vacuum only in specific positions usually has broken internal conductors. Temporary tape fixes are unsafe and should never be relied on long-term.
Diagnose Retraction Failures
If your cord refuses to rewind, check whether it was pulled beyond the red tape indicator (common on Hoover models like the UH71250). This over-extension can disengage the internal spring or lock the latch mechanism, disabling retraction entirely.
Try guiding the cord back into the housing by hand with gentle, even pressure. Sometimes this simple reset releases the latch and allows the spring to rewind naturally. Listen for clicking sounds as you slowly release the cord. Silence often points to a broken spring or disengaged mechanism. Never yank or force a stuck cord, as this worsens internal damage.
Test Power Delivery
Plug your vacuum into a known working outlet and turn it on. If the motor doesn’t respond, the issue may involve internal connections rather than the cord itself. However, flickering power when you wiggle the cord strongly suggests broken internal wires. A multimeter can confirm continuity issues, but when in doubt, replacement is the safer option.
Prepare Your Workspace and Tools

Prioritize Electrical Safety
Always unplug the vacuum from the wall outlet before any inspection or repair. Turning off the power switch is not enough. Working on live components risks severe shock or worse. Make sure your workspace is dry, well-lit, and free from distractions. Keep children and pets away while you work.
Gather the Right Tools
Having everything ready before you start saves time and prevents mistakes. You’ll need:
– Phillips and flathead screwdrivers
– Wire strippers
– Needle-nose pliers
– Electrical tape or heat shrink tubing
– A compatible replacement cord (if replacing)
A soldering iron with solder creates stronger, more durable connections but isn’t strictly required. If you’re replacing the cord, match the original voltage, amperage, and wire gauge. Check your vacuum’s label or manual for exact specifications, and avoid undersized or non-compatible alternatives.
Open the Cord Housing Safely
Locate the Reel Compartment
Place the vacuum on a stable, flat surface with plenty of room to work. The cord reel is usually on the back or side of the unit. Remove the screws securing the housing cover, keeping them organized by location for reassembly. Some models hide screws under labels or rubber feet, so check carefully before prying.
Document Before Disassembly
Take photos at each stage of disassembly. These visual references make reassembly much easier and prevent connection errors. Carefully separate the housing halves, watching for plastic clips that can break if forced. Once open, note the cord’s routing path through the housing and the location of internal connections.
Disconnect the Old Cord Correctly
Identify the Terminal Connections
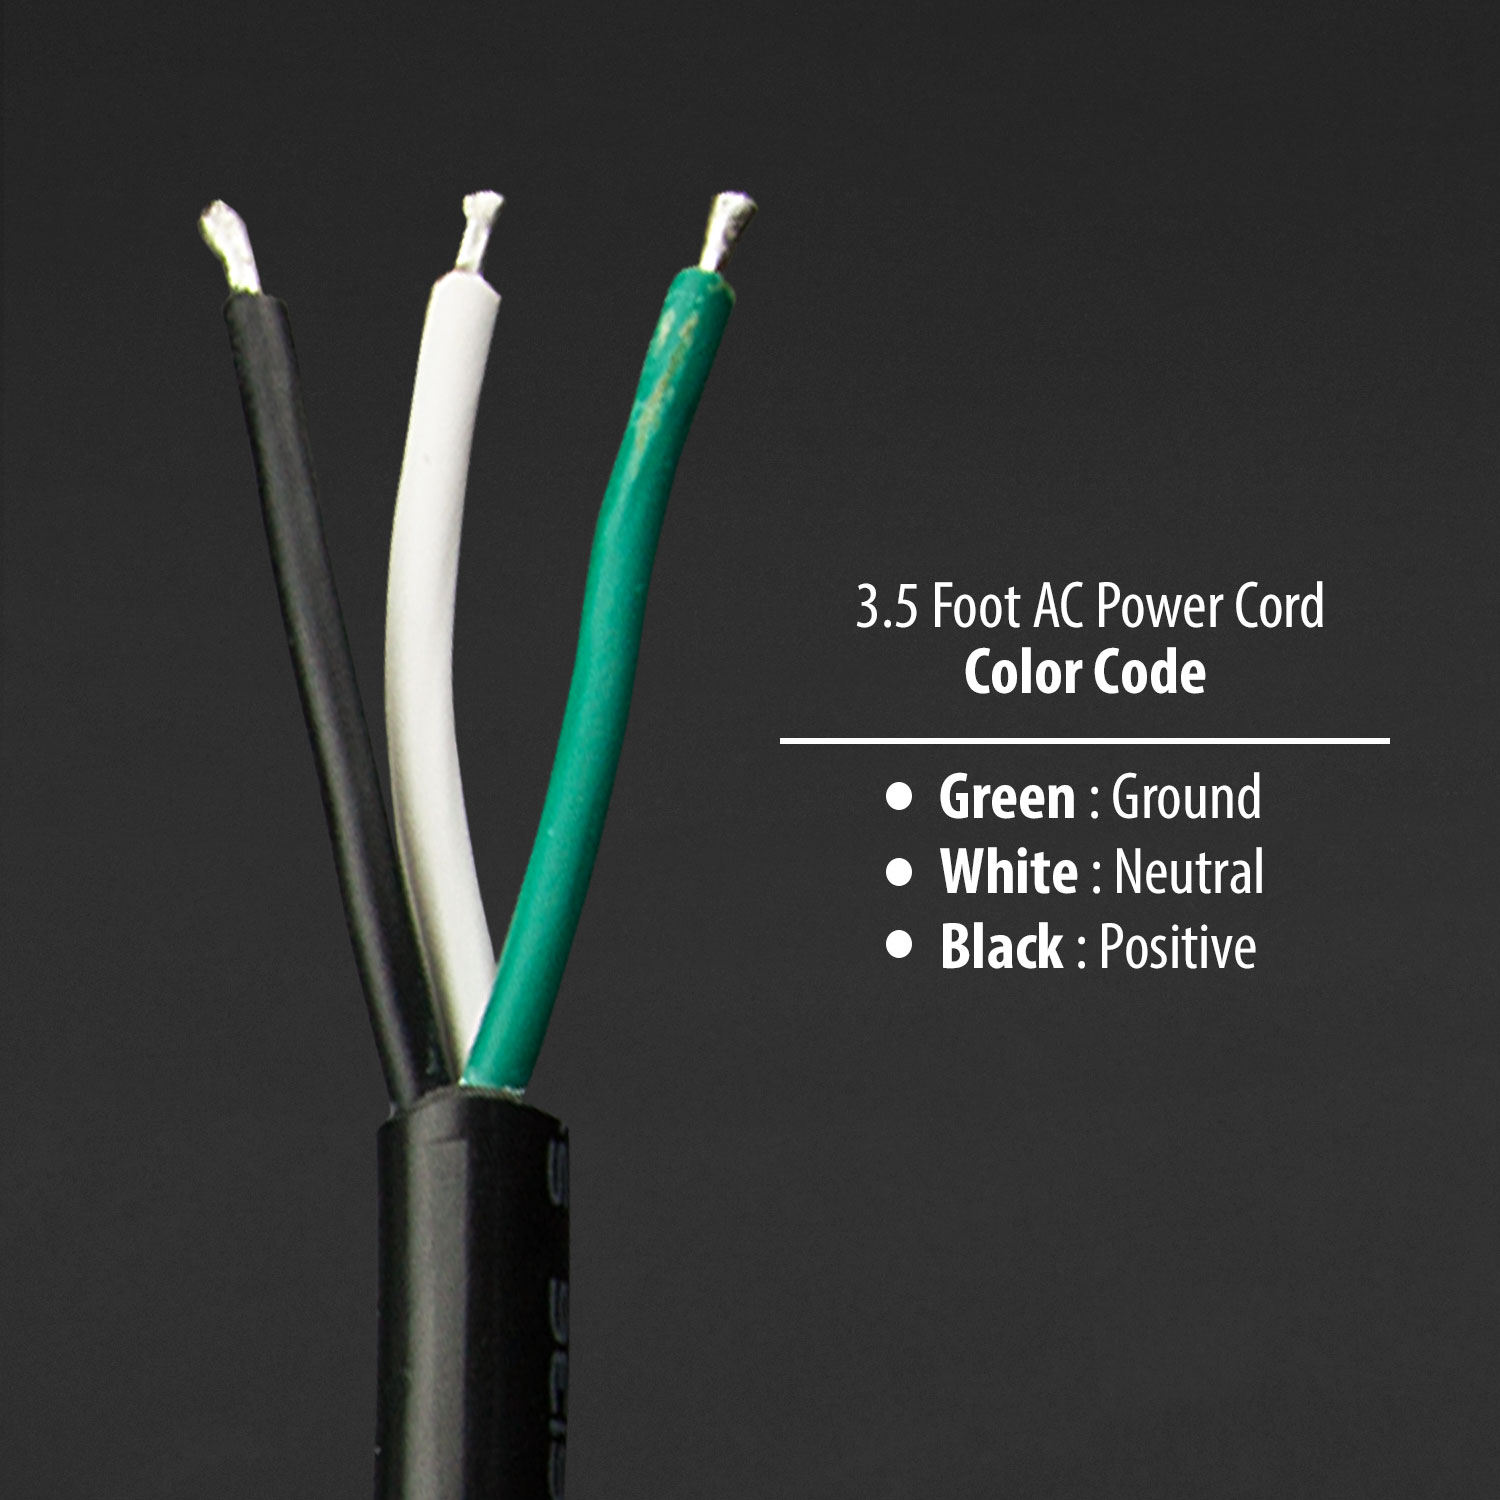
Most vacuums use a color-coded terminal block where wires connect. The standard color code is:
– Black (hot) connects to the brass or dark terminal
– White (neutral) connects to the silver or light terminal
– Green or bare copper (ground) connects to the green screw or metal frame
Loosen each terminal screw and remove the wires, noting exactly where each one was attached. If connections are soldered rather than screwed, heat the joint with a soldering iron until the solder melts, then gently pull the wire free.
Label Wires to Prevent Errors
Before removing anything, label each wire with tape or photograph the connections up close. Mixing up wire positions is one of the most common causes of post-repair failures and creates serious shock and fire hazards. After disconnecting, clean the terminals with a dry cloth to ensure good contact with the new wires.
Install the New Cord Properly
Route the Replacement Cord
Feed the new cord through the housing, following the original path exactly. Leave enough slack to reach the terminals without tension or pulling. The cord should pass smoothly through any strain relief grommet, which protects against tugging damage. Never pinch the cord between housing parts, as this creates new stress points.
Secure the Wire Connections
Attach each wire to its matching terminal, tightening screws firmly without over-torquing and stripping them. For soldered connections, apply solder evenly, then cover the joint completely with heat shrink tubing or electrical tape. Every connection must be fully insulated with no exposed copper visible.
Pro Tip: Tug each wire gently after securing to confirm it won’t slip. Loose connections cause arcing, overheating, and intermittent power loss.
Verify Everything Before Reassembly
Double-check that all wire colors match the correct terminals. Confirm insulation covers every metal connection completely. Make sure no stray copper strands remain exposed. Only when you’re confident everything is correct should you move on to closing the housing.
Reassemble and Test Your Repair
Close the Housing Carefully
Align the cover properly and replace all screws in their original locations. Ensure the housing seals completely and the cord exits smoothly without pinching. A misaligned case can damage the cord or interfere with retraction. Test by pulling the cord out and letting it retract to confirm smooth operation.
Power On with Caution
Plug the vacuum into a dry outlet and turn it on. Watch closely for sparks, smoke, or unusual smells. If any appear, shut off the power immediately. Run the vacuum for one to two minutes while monitoring stability, cord flexibility, and retraction function. Normal motor operation and proper cord behavior confirm a successful repair.
Fix Cords That Won’t Retract
Reset After Over-Extension
If your cord was pulled past the red tape indicator on a Hoover UH71250 or similar model, manual reset may solve the problem. Guide the cord back toward the base with gentle, even pressure. This action can release the latch and allow the spring to rewind. Once retraction starts, let it complete naturally without interrupting the process.
Know When the Spring Is Damaged
When manual reset fails, the internal spring is likely broken or permanently disengaged. These mechanisms aren’t user-serviceable, and attempting repairs can ruin the entire reel assembly. The best options are replacing the complete cord reel or consulting an authorized service center for professional help.
Use Your Warranty When Possible
If your vacuum is relatively new and still under warranty, contact the manufacturer or retailer right away. Many offer free repair or replacement for retraction failures caused by over-extension. Keep your receipt handy and document the issue with photos to support your claim.
Decide Between Repair and Replacement
Repair Makes Sense for Minor Damage
A small fray or crack near the plug doesn’t always require a full replacement, especially if your vacuum is otherwise in good condition. Plug-end replacement kits and partial cord repairs can extend the life of a functional machine at minimal cost.
Replace for Severe or Extensive Damage
Replacement is the smarter choice when:
– The cord is severed or heavily frayed
– Internal wire breaks are confirmed
– The retractor mechanism is broken
– Repair costs approach the price of a new vacuum
– You’re uncomfortable handling electrical work
Modern vacuums often deliver better suction, improved filtration, and greater energy efficiency than older models.
Prevent Future Cord Problems
Respect the Extension Limits
Never pull the cord beyond the red tape indicator on retractable models. That mark shows the maximum safe length, and exceeding it risks spring damage and retraction failure. Always let the cord retract slowly rather than yanking it back.
Store Your Cord with Care
Allow retractable cords to rewind naturally after each use. For manual-wind models, wrap the cord loosely in a figure-eight pattern or over your hand to prevent kinks. Never run the vacuum over its own cord, as this causes wear and potential internal damage.
Inspect and Maintain Regularly
Check the cord monthly for early signs of wear, paying attention to bends and connection points. Keep the retraction slot clean and free of dust or debris. Addressing small issues promptly prevents them from becoming safety hazards or expensive repairs.
Frequently Asked Questions About Vacuum Cord Repair
Can a kinked vacuum cord be fixed without replacement?
Minor kinks often relax over time with proper storage and gentle handling. Wrapping the cord loosely after each use and avoiding sharp bends helps it return to its original shape. However, severe kinks with visible insulation damage require replacement for safety reasons.
Why won’t my vacuum cord retract after pulling it out too far?
Most retractable vacuums have a safety limit marked by red tape. Pulling past this point can disengage the internal spring or lock the latch mechanism. Try gently guiding the cord back into the housing with even pressure. If this doesn’t work, the spring may be damaged and need professional service.
Is it safe to use electrical tape on a damaged vacuum cord?
Electrical tape is only acceptable as a very short-term, emergency fix for minor outer insulation damage. It cannot repair internal wire breaks or damaged conductors. For lasting safety, replace the cord or the entire vacuum if damage extends beyond the outer jacket.
How do I know if my vacuum cord needs full replacement?
Replace the cord if you notice exposed wires, burnt spots, melted insulation, or intermittent power when bending the cord. A cord that only works in certain positions has broken internal conductors and poses a shock or fire risk.
Can I replace a vacuum cord myself, or should I hire a professional?
DIY replacement is feasible if you’re comfortable with basic electrical work, have the right tools, and follow safety protocols carefully. However, if the vacuum is under warranty, professional repair preserves your coverage. When in doubt, consult an authorized service center to avoid safety risks or further damage.
Key Takeaways for Straightening Your Vacuum Cord
A damaged or malfunctioning vacuum cord doesn’t always mean replacing the entire machine. Identifying problems early, following proper safety procedures, and using compatible replacement parts can restore function and extend your vacuum’s lifespan significantly.
Start by inspecting the cord for visible damage, testing the retraction mechanism, and unplugging the vacuum before any repair work. Whether you’re resetting an over-extended cord, replacing damaged wiring, or deciding between repair and replacement, prioritize safety at every step.
Your next step: Examine your vacuum cord today using the inspection tips in this guide. Catching small issues now prevents costly repairs and keeps your home safe from electrical hazards.


