
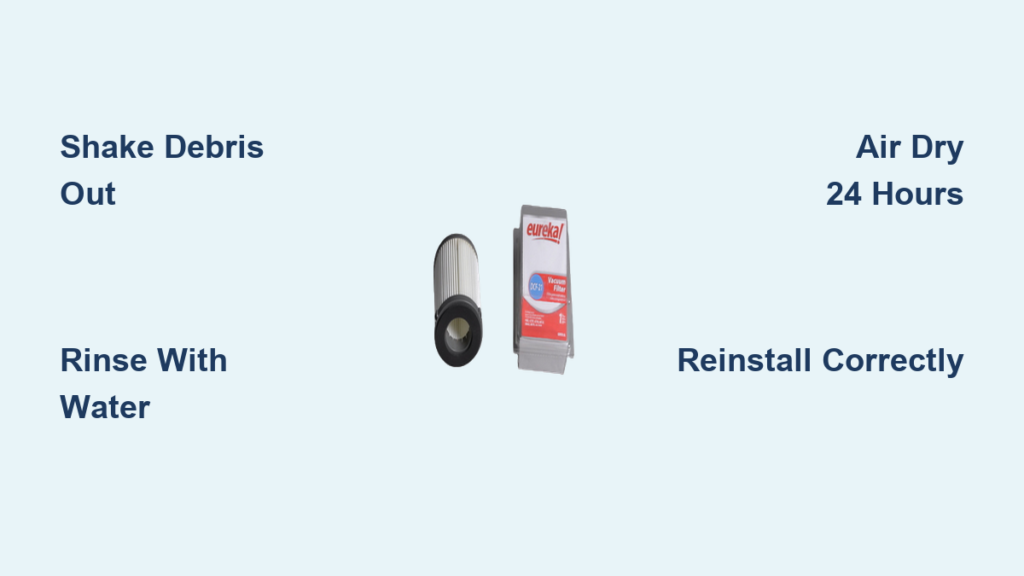
Is your Eureka vacuum losing suction or pushing dust back into the air? A clogged filter is often the reason. Knowing how to clean a Eureka vacuum filter properly can restore strong suction, improve airflow, and keep your indoor air fresh. Most Eureka models use washable filters built for long-term reuse, but they only perform well when maintained on a routine schedule. In this guide, you will learn how to safely remove, rinse, dry, and reinstall your filter in under 10 minutes. Whether you own a central vacuum or an upright model, these steps will help your machine run like new.
Let’s walk through the exact process for cleaning your Eureka vacuum filter so it delivers consistent power every time you use it.
Identify Your Eureka Filter Type
Before cleaning anything, confirm whether your filter is washable or disposable. Using the wrong method can damage the filter or your vacuum.
Check for Washable Filters
Washable filters are usually made from:
– Foam (sponge-like material)
– Pleated synthetic fabric
Both are designed to be rinsed and reused. Most modern Eureka uprights and central vacuum systems come with this type.
Spot Disposable Filters
Disposable filters typically feature:
– Paper-based construction
– A “Do Not Wash” label on the frame
– Rigid cardboard edges
If yours is disposable, swap it out every 6 to 12 months instead of rinsing it.
Pro Tip: Find your model number on the bottom or back of the unit, then check the Eureka website or your owner’s manual to confirm the filter type.
Turn Off and Unplug the Vacuum
Safety always comes first when handling internal parts. Disconnect power before you begin.
- Switch off the vacuum at the unit.
- Unplug it from the wall outlet.
- For central systems, turn off the circuit breaker.
This prevents accidental startup and protects you from electrical hazards when working near damp components.
Access the Filter Compartment

The filter location depends on your Eureka model, but common access points include:
– Behind the dust cup on upright models
– On the top or side of the motor housing for canister or central units
Steps to Open the Compartment:
- Release the latch or unscrew the cover panel.
- Lift the cover to expose the filter.
- Look for arrows or labels that indicate airflow direction.
Noting the orientation now ensures you reinstall the filter correctly later.
Remove the Filter Safely
Handle the filter gently to avoid tearing the foam or bending the pleats.
- Slide or lift the filter out of its housing.
- Keep it upright as you remove it to prevent dust from falling into the motor.
- Set it on a clean surface while you prep your cleaning area.
Shake Out Loose Debris
A quick dry cleanup reduces mess during the wet rinse step.
- Hold the filter over a trash can.
- Tap it lightly with your hand.
- Flick away visible dust, hair, and lint.
Avoid aggressive shaking or beating, which can tear foam or damage pleats.
Common Mistake: Skipping this step often leads to clogged sinks and dusty countertops when rinsing.
Rinse the Filter Thoroughly
Now you are ready to deep-clean the filter and remove embedded particles.
What You Will Need:
- A sink or basin
- Lukewarm water
- A soft brush (optional)
How to Rinse:
- Hold the filter under a gentle stream of lukewarm water.
- For foam filters, squeeze and release the material several times to flush out trapped dirt.
- For pleated filters, rinse from the clean side toward the dirty side, which is opposite the airflow direction.
- Use a soft brush to loosen stubborn grime without scrubbing hard.
Never Use:
– Hot water (can melt foam)
– Detergent or soap (leaves residue)
– A dishwasher or washing machine (damages the structure)
A proper rinse removes fine dust that shaking alone cannot reach.
Air Dry the Filter Completely
Moisture is the biggest threat to your vacuum’s motor. Installing a damp filter can cause mold, odors, and electrical damage.
Drying Best Practices:
- Place the filter on a clean towel in a warm, well-ventilated area.
- Rotate it occasionally so all sides dry evenly.
- Allow at least 24 hours before reinstalling.
Do This: Prop the filter upright or hang it so air circulates around every surface.
Don’t Do This: Use a hairdryer, microwave, oven, or space heater, since heat warps the material.Expert Note: Even slight dampness can short-circuit the motor. When in doubt, wait an extra few hours.
Reinstall the Filter Correctly
Once the filter feels bone dry, you can put everything back together.
- Align the filter with the housing guides or arrows.
- Insert it in the same orientation you noted earlier.
- Close and lock the cover securely.
Make sure there are no gaps or misalignments. Air leaks reduce suction and put extra strain on the motor.
Test Vacuum Performance
Power up the unit and verify your work.
- Turn the vacuum on.
- Feel for strong suction at the hose or nozzle.
- Listen for a smooth motor sound without wheezing or strain.
If performance is still weak, check for:
– Clogs in the hose or wand
– A full dust cup
– A worn belt on upright models
A clean filter should restore most lost power.
Maintain Pre-Motor and Post-Motor Filters Separately
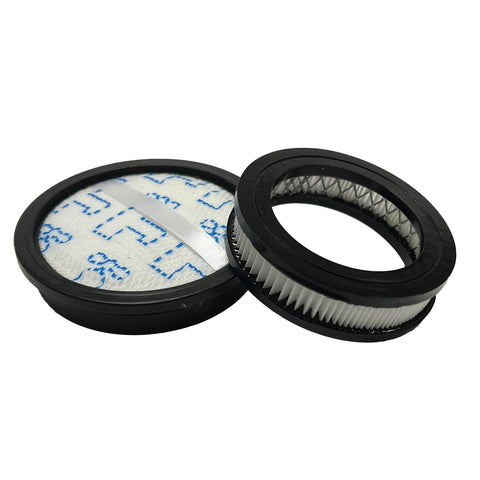
Many Eureka vacuums have two filters: a pre-motor filter and a post-motor (exhaust) filter.
Pre-Motor Filter
- Sits before the motor
- Blocks large debris from reaching internal parts
- Clean every 1 to 2 months
Post-Motor (Exhaust) Filter
- Located at the air outlet
- Traps fine dust before air leaves the unit
- Must stay clean to prevent musty smells
Both filters follow the same rinse and air-dry process if they are washable.
Pro Tip: Some models use a HEPA-style exhaust filter. Check whether yours needs periodic replacement even if it is technically washable.
Replace Filters When Damaged or Worn
Even well-cared-for filters eventually wear out. Replace yours if you notice:
– Torn, compressed, or flat foam
– Ripped or separating pleats
– Cracks in the filter frame
– Persistent suction loss after cleaning
– Musty odors that remain after drying
Most washable filters last 1 to 2 years with regular care.
OEM vs. Generic: Choose genuine Eureka replacements for proper fit and full filtration efficiency.
Set a Routine Cleaning Schedule
Staying ahead of buildup keeps your vacuum performing at its best.
| Frequency | Task |
|---|---|
| Every 1 month | Shake out the pre-motor filter |
| Every 3 months | Rinse and dry the filter |
| Every 6 months | Inspect for damage |
| Annually | Replace disposable or worn washable filters |
Homes with pets or heavy carpet use may need monthly rinses.
Time-Saver: Mark your calendar or set a phone reminder labeled “Clean Eureka Filter.”
Avoid These Common Cleaning Mistakes
Small errors can shorten filter life and reduce vacuum power.
- Reinstalling a damp filter, which causes mold and motor burnout
- Using soap or detergent, which leaves residue that attracts more dirt
- Skipping the pre-rinse shake, which clogs the sink drain
- Washing disposable filters, which ruins their structure
- Forgetting the exhaust filter, which lowers indoor air quality
Following the correct steps protects your vacuum and your home’s air.
Troubleshoot Poor Suction After Cleaning
Still feeling weak suction after filter maintenance? Run through this quick checklist.
- Is the filter fully dry?
- Is it installed with the airflow arrow pointing the right way?
- Is the dust cup empty?
- Are the hose and wand clear of blockages?
- Is the belt intact on upright models?
If everything checks out but suction stays low, the motor seals or fan may need professional service.
When to Call a Pro: If the motor sounds labored or overheats, stop using the vacuum and contact Eureka support.
Frequently Asked Questions About Cleaning a Eureka Vacuum Filter
How often should I clean my Eureka vacuum filter?
Clean washable filters every 1 to 3 months, depending on how often you vacuum. Homes with pets or heavy dust may need monthly cleaning.
Can I wash a Eureka vacuum filter with soap?
No. Use only lukewarm water unless your owner’s manual specifically states that a mild detergent is safe. Soap can leave residue that traps more dust.
How long does it take for a Eureka filter to dry?
Allow at least 24 hours of air drying in a well-ventilated area. Installing a damp filter can damage the motor and cause mold growth.
What happens if I put the filter back wet?
Moisture can short-circuit the motor, create mold or mildew, and produce unpleasant odors. Always wait until the filter is completely dry before reinstalling.
How do I know if my Eureka filter is washable or disposable?
Check the filter frame for a “Do Not Wash” label. Washable filters are usually foam or pleated synthetic material, while disposable filters are paper-based.
When should I replace my Eureka filter instead of cleaning it?
Replace the filter if it is torn, compressed, cracked, or no longer holds its shape, or if suction stays weak even after a proper cleaning.
Final Tips for Long-Lasting Eureka Vacuum Performance
A few simple habits will keep your vacuum running strong for years. Empty the dust cup after every use, clear the hose monthly, and store the unit with the filter compartment open to prevent moisture buildup. Stick with Eureka-approved accessories to protect your warranty.
Now that you know how to clean a Eureka vacuum filter the right way, set a reminder today and give your filter a quick rinse. Ten minutes of care today can save you from costly repairs and weak suction tomorrow.


