

Wall mounting your Tineco vacuum keeps it charged, organized, and ready for quick cleanups. Many cordless models work with wall mounts, but the process involves choosing compatible hardware, finding the right spot, and installing it safely. This guide explains how to hang a Tineco vacuum step by step, from checking model compatibility to securing the bracket and storing your device properly.
You’ll learn which models support wall mounting, what tools you need, where to install the bracket, and how to avoid common mistakes. By the end, your vacuum will be easy to grab whenever messes happen.
Check Tineco Vacuum Compatibility for Wall Mounting
Before drilling any holes, confirm your Tineco model is designed for vertical wall storage. Not every vacuum in the Tineco lineup supports this setup.
Identify Wall-Mount-Ready Tineco Models
Most Tineco cordless stick vacuums are wall-mount compatible. The Tineco PURE One Series (S3, S4, S5, S11) and Tineco A Series (A11, A12) typically work with dedicated brackets. The Tineco iFLOOR models can also be wall-mounted when paired with separate docking kits.
Check your user manual, original packaging, or the Tineco website for your specific model number. Look for a wall mount symbol or mention of vertical storage.
Locate the Mounting Notch on Your Vacuum
Tineco vacuums built for wall hanging have a small rear mounting notch. This groove sits just above the battery pack or below the handle on the back of the unit. The notch locks onto the wall bracket’s hook or clip to hold the vacuum in place.
Run your fingers along the back of your vacuum. If you find a flat edge or small groove, your model likely supports wall mounting. If no notch exists, your vacuum isn’t designed for vertical hanging.
Select the Correct Wall Mount Bracket
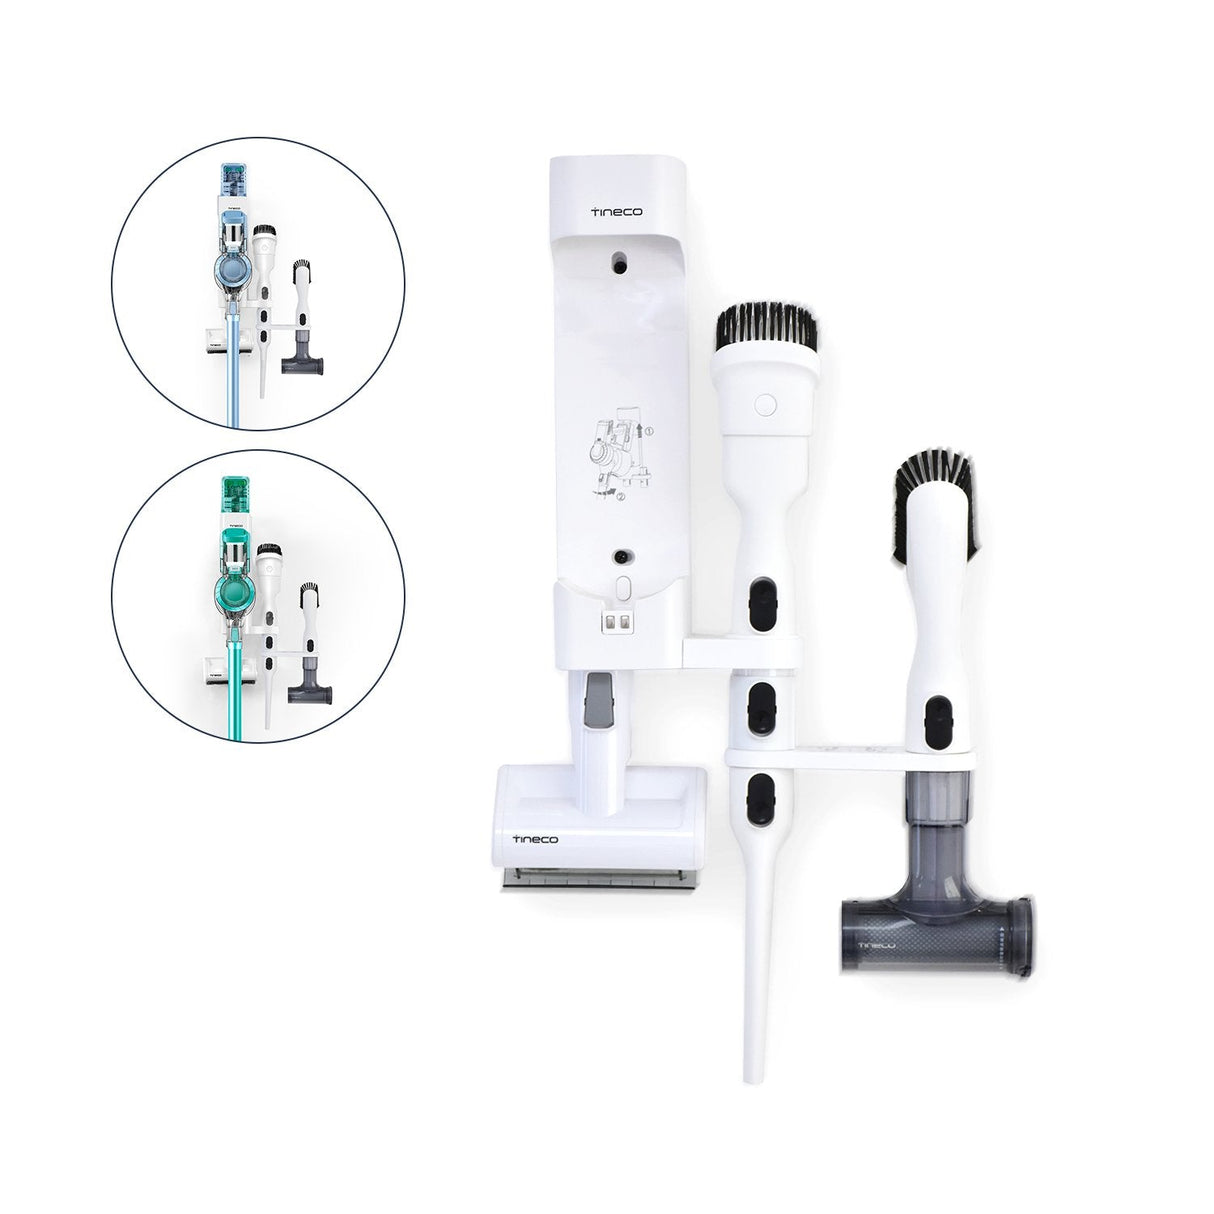
Choosing the right bracket protects your vacuum and ensures a secure fit. You have three main options, each with different benefits.
Buy an OEM Tineco Wall Mount
Tineco’s official wall mount is engineered to fit your specific model. It includes a sturdy plastic or metal bracket, pre-drilled holes, and built-in cable routing on some versions.
Pros:
– Guaranteed fit for your model
– Maintains warranty coverage
– Often includes charging port alignment
Cons:
– Usually costs $15 to $25
– Must be purchased separately for some models
Search for “Tineco [your model number] wall mount” on Amazon or the Tineco store to find the correct OEM part.
Consider Universal Vacuum Hangers
Universal wall hooks work across multiple vacuum brands. Choose models labeled “for cordless vacuums” with rubberized grips to prevent slipping.
Pros:
– Lower price point
– Fits various devices if you own multiple vacuums
Cons:
– Less secure than OEM options
– May not support charging cable weight
– Could void warranty if damage occurs
Avoid generic friction-only hooks. These often fail over time and risk dropping your vacuum.
Explore DIY or 3D-Printed Bracket Options
Tech-savvy users sometimes create custom mounts using 3D-printed designs from sites like Thingiverse. These can be cost-effective and tailored to your model.
Pros:
– Customizable to your exact vacuum
– Lower cost if you own a 3D printer
Cons:
– Requires testing to ensure strength
– Material quality varies (use ABS or PETG plastic)
– May not support heavier units safely
Choose the Best Mounting Location
Where you install the bracket affects convenience, safety, and cable management. Pick your spot carefully before grabbing tools.
Place the Mount Near a Power Outlet
Most Tineco vacuums charge while mounted, so position the bracket within 2 to 3 feet of an electrical outlet. This keeps cords short and prevents tripping hazards from dangling wires.
Some mounts include built-in cable clips for neat routing. If yours doesn’t, plan to add adhesive cord holders.
Mount at an Accessible Height
Install the bracket 48 to 60 inches from the floor. This height range keeps the vacuum visible, prevents accidental kicks, and makes it easy to grab for quick cleanups.
Avoid mounting above eye level. You’ll struggle to see whether the vacuum is properly seated in the bracket.
Pick a Dry, Low-Traffic Area
Never mount your vacuum in damp locations like bathrooms or uncovered outdoor spaces. Moisture can damage the battery and electronics.
Choose a closet, pantry, utility room, or garage corner instead. Keep the mount away from high-traffic zones where people might bump into the hanging vacuum.
Gather the Right Installation Tools
Having proper tools on hand ensures a secure, damage-free installation. Most of these items are common household tools.
Essential Tools for Mounting
You will need a Phillips screwdriver or power drill, a level (bubble or laser), a pencil for marking screw positions, wall anchors rated for at least 10 pounds, and a hammer for tapping anchors into place.
Pro Tip: Never use double-sided tape, command strips, or suction cups. These adhesives fail over time and risk dropping your vacuum onto a hard floor.
Optional Tools That Help
A stud finder helps locate wood studs in drywall for extra-secure mounting. Cord clips or adhesive cable ties keep charging wires neat. A voltage tester confirms no electrical wires run behind your drilling spot.
Install the Wall Mount in 5 Steps
Follow this process to mount your bracket securely and correctly.
Step 1: Mark the Screw Positions
Hold the wall mount against the wall at your chosen height. Place a level on top of the bracket to confirm it’s perfectly horizontal. Use your pencil to mark each screw hole.
If the mount has two screw points, measure the distance between them with a ruler. Even a slight tilt prevents the vacuum from locking properly.
Step 2: Drill Pilot Holes
Select a drill bit slightly smaller than your mounting screws. Drill pilot holes at each marked position.
For drywall without a stud behind it, insert plastic wall anchors before proceeding. Tap them gently with a hammer until flush with the wall surface.
If you hit a wood stud, skip the anchors. Screws driven directly into studs hold more securely than anchors alone.
Step 3: Secure the Bracket to the Wall
Align the mount’s holes with your pilot holes or anchors. Drive the screws in with your screwdriver or drill.
Avoid overtightening. Excess force can strip the plastic bracket or crack the drywall around the anchor.
Step 4: Test the Bracket Stability
Gently tug the mounted bracket side to side and up and down. It should feel completely solid with no wiggle or shift.
If the bracket moves, remove the screws and check your anchor installation. Loose mounts are the most common reason vacuums fall.
Step 5: Hang the Vacuum
Hold your Tineco vacuum vertically with both hands. Align the rear mounting notch with the bracket’s hook. Slide the vacuum down slowly until you feel it click or lock into place.
Visual Check: The vacuum should sit perfectly straight with no forward tilt. A properly mounted unit will not wobble or shift when gently nudged.
Connect the Charger and Confirm Charging
With the vacuum secured, plug in the charging cable and verify everything works.
Plug In the Charging Cable
Connect the charger to the vacuum’s charging port, then plug the other end into your wall outlet. Many Tineco models show a red light while charging and switch to green when fully charged.
Route the cable along the wall using adhesive clips. This prevents the cord from dangling and creating a tripping hazard.
Warning: Never leave your vacuum charging for more than 24 hours at a time. Extended charging can reduce long-term battery performance.
Troubleshoot Common Mounting Problems
Even careful installation can hit snags. Here’s how to fix the most frequent issues.
Vacuum Won’t Stay on the Mount
Likely Cause: The bracket is uneven, or the mounting notch isn’t fully engaged.
Solution: Remove the vacuum and recheck the bracket level. Rehang the unit and confirm the notch clicks into place.
Charging Doesn’t Start
Likely Cause: Dirty charging contacts or loose cable connection.
Solution: Unplug the charger and wipe the metal charging pins with a dry cloth. Reconnect firmly and check for the indicator light.
Mount Feels Loose or Wobbly
Likely Cause: Weak wall anchors or screws not driven into a stud.
Solution: Remove the bracket, install heavier-duty anchors, or relocate to a stud location. Reattach and test again.
Explore Alternative Storage Options

Wall mounting isn’t right for every home. Consider these alternatives if drilling isn’t an option.
Use a Freestanding Charging Dock
Tineco offers floor stands that hold and charge the vacuum without wall installation. These work well for renters or homes with concrete, brick, or tile walls.
Pros:
– No drilling required
– Portable between rooms
– Stable base for most models
Cons:
– Takes up floor space
– Can tip if bumped by pets or children
Store on a Countertop or Shelf
Place the vacuum upright on a sturdy shelf with the charging cord plugged in. Add a non-slip mat underneath to prevent sliding.
Important: Never store the vacuum lying flat on the floor. This position can damage the brush head and strain the battery connection.
Maintain Your Wall Mount for Long-Term Safety
A quick monthly check keeps your installation secure and your vacuum protected.
Inspect the Bracket Monthly
Check all screws and anchors for looseness. Tighten anything that has shifted over time.
Look closely at plastic brackets for hairline cracks. Replace damaged brackets immediately before they fail under the vacuum’s weight.
Clean the Mounting Notch Regularly
Dust and debris collect in the vacuum’s rear notch over time. Wipe it monthly with a dry microfiber cloth to maintain a secure lock.
Keep the Mount Free of Extra Weight
Never hang cleaning cloths, brushes, or tools on the bracket. The mount is engineered only for your vacuum’s specific weight. Adding extra items risks pulling the bracket from the wall.
Frequently Asked Questions About Hanging a Tineco Vacuum
Do All Tineco Vacuums Come With a Wall Mount?
No. Most Tineco vacuums do not include a wall mount in the box. You typically need to purchase the OEM bracket separately or use a compatible universal mount.
Can I Wall Mount a Tineco Without Drilling?
Yes. Freestanding charging docks and countertop storage options let you store your Tineco vertically without drilling holes. Adhesive mounts are not recommended since they can fail and damage your vacuum.
How Much Weight Can a Tineco Wall Mount Hold?
OEM Tineco mounts are designed specifically for the weight of their matching vacuum models, typically between 5 and 10 pounds. Do not hang additional items on the same bracket.
Will Wall Mounting Void My Tineco Warranty?
Using the official OEM wall mount does not void your warranty. Third-party or DIY mounts may void coverage if they cause damage to the vacuum during installation or use.
Where Is the Best Place to Mount a Tineco Vacuum?
The best location is a dry, low-traffic area near a power outlet. Closets, utility rooms, and pantry walls work well. Avoid bathrooms, outdoor spaces, and high-traffic hallways.
How High Should I Mount My Tineco on the Wall?
Mount the bracket 48 to 60 inches from the floor. This height keeps the vacuum visible, accessible, and safe from accidental kicks or bumps.
Key Takeaways for Hanging Your Tineco Vacuum
Wall mounting your Tineco vacuum keeps it charged, organized, and ready for action. Start by confirming your model supports vertical mounting and locating the rear notch. Choose an OEM bracket whenever possible for the best fit and warranty protection.
Install the mount near a power outlet at a height between 48 and 60 inches, using proper wall anchors or wood studs. Check the bracket’s stability before hanging your vacuum, and route the charging cable neatly along the wall.
Inspect the mount monthly and clean the vacuum’s notch regularly to maintain a secure hold. If wall mounting isn’t possible, a freestanding charging dock offers a convenient alternative. Now you have everything needed to hang your Tineco vacuum safely and keep your space clutter-free.


