
You just unboxed your new iLife robot vacuum, and you’re ready to enjoy hands-free cleaning, but where do you even start? With so many buttons, modes, and settings, it’s easy to feel overwhelmed before you press play. The good news is that once you understand the basics, running your iLife robot is simple and intuitive. This guide walks you through every step from first charge to daily scheduling.
iLife robot vacuums combine compact navigation, strong suction, and app-based control into one convenient device. You can clean hardwood, tile, carpet, and low-pile rugs with minimal effort once you know how to charge, start, and maintain the unit. Below, you’ll learn how to set up your robot, control it with a remote or app, and keep it running smoothly for years.
Charge Your iLife Robot Before the First Run
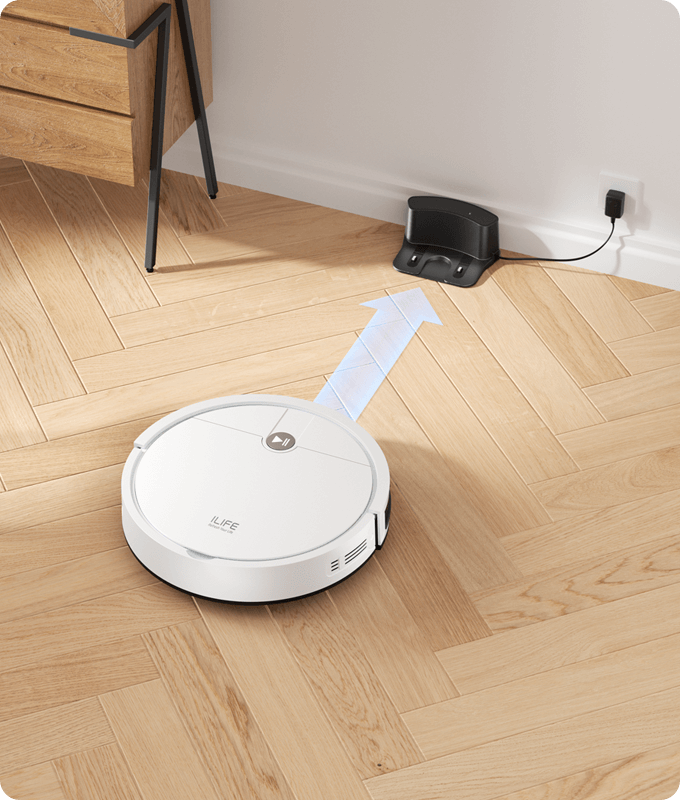
Always charge your robot fully before its first cleaning session. A full charge calibrates the battery and ensures maximum runtime.
Position the Charging Dock Correctly
Place the dock flat against a wall in an open area, away from furniture or cords. Leave at least 1.5 feet of clearance on both sides and 3 feet in front. Plug the adapter into a nearby wall outlet.
Dock the Robot and Wait for a Full Charge
Turn the robot over and locate the two metal charging strips on the front. Align them with the contacts on the dock. On manual models, gently push the robot until it clicks. On auto-return models, press “Home” to send it back.
A solid red light means charging. A solid green or blue light means a full charge, usually reached after 3 to 4 hours.
Power On and Reset the Robot
Turn the robot on before pairing or cleaning. A quick reset can also fix early glitches.
Turn the Robot On
Press and hold the “Power” button (circle symbol) on top of the unit for 3 seconds. The indicator light will turn on, and you may hear a startup chime.
Perform a Factory Reset if Needed
If the robot was used before or behaves oddly, reset it:
- Hold “Power” and “Spot Clean” for 10 seconds.
- Wait for the lights to flash.
- Release the buttons and let the robot reboot.
This clears old Wi-Fi data and restores default settings.
Install and Clean the Dustbin
A clean dustbin keeps suction strong and prevents clogs.
Remove and Empty the Dustbin
Slide the dustbin out from the side or bottom of the robot. Open the lid and tap debris into a trash can.
Rinse and Dry the Bin
- Empty after every cleaning session.
- Rinse with water (do not submerge electronics).
- Air dry fully before reinstalling.
- Wipe the sensor near the bin slot with a dry cloth.
Reinstall the Dustbin Securely
Slide the dry bin back into place until it clicks. A loose fit can cause suction loss or false error alerts.
Use the Remote Control for Basic Operation
The included remote gives you full control without Wi-Fi.
Learn the Remote Buttons
- Power: Start or stop cleaning.
- Auto: Begin a full-room clean.
- Spot: Clean a 3-foot circle around the robot.
- Edge: Run along walls and corners.
- Direction Arrows: Manually steer the robot.
- Home: Send the robot back to the dock.
- Schedule: Set daily cleaning times.
Start a Clean Without the App
If you don’t want to use Wi-Fi, the remote is your main tool. Press “Auto,” and the robot will navigate using its infrared and drop sensors.
Connect the Robot to the iLife App
App control unlocks advanced features on supported models.
Download the iLife App
Search “iLife Home” or “iLife Robot” in the App Store or Google Play. Install and open the app.
Pair the Robot via Wi-Fi
- Connect your phone to a 2.4 GHz Wi-Fi network (5 GHz is not supported).
- Power on the robot.
- Hold “Spot” and “Edge” for 5 seconds until the Wi-Fi light blinks.
- In the app, tap “Add Device” and select your model.
- Enter your Wi-Fi password to finish pairing.
Once connected, you can start, stop, schedule, and monitor cleanings from anywhere.
Start a Cleaning Cycle
Choose the method that fits your routine.
Manual Start Using the Robot or Remote
Press “Auto” on the robot or remote to begin a full clean. The robot will move room to room and avoid stairs using its sensors.
App-Controlled Start
Open the iLife app and tap “Clean.” Depending on your model, you may see:
- Standard Clean
- Quiet Mode
- Max Suction Mode
- Custom Zone
The robot starts immediately and returns to the dock when finished.
Schedule Automatic Daily Cleanings
Set a schedule to keep floors tidy without lifting a finger.
Schedule With the Remote
- Press “Schedule.”
- Use arrows to choose day, hour, and minute.
- Press “OK” to confirm.
- Repeat for additional days.
Schedule With the App
Open “Schedule” in the app, pick days and times, and select a cleaning mode. You can store up to 7 schedules.
Clean the Sensors and Brushes
Routine maintenance prevents breakdowns and keeps performance high.
Wipe the Sensors Weekly
Use a dry microfiber cloth to clean:
- Cliff sensors (under the front bumper) to prevent falls.
- Bumper sensor for wall detection.
- Dustbin sensor for accurate alerts.
- Wi-Fi antenna to maintain signal strength.
Remove and Clean the Brushes
Main Brush Roller
- Open the brush cover on the bottom.
- Pull out the roller.
- Cut away tangled hair and debris.
- Rinse with water and let dry.
- Reinsert and lock the cover.
Side Brushes
Pull the small rubber arms outward to remove them. Wipe clean and reattach, making sure they spin freely.
Troubleshoot Common iLife Robot Problems

Quick fixes for the most frequent issues.
Robot Won’t Charge
- Test the outlet with another device.
- Wipe the robot and dock charging contacts.
- Move the dock off carpet or rugs.
- Manually dock the robot to test connection.
Robot Spins in Place or Gets Stuck
- Clear shoes, cords, and rugs from the floor.
- Remove hair wrapped around the wheels.
- Clean cliff and bumper sensors.
- Reset the robot using the power method above.
Robot Loses Navigation or Behaves Randomly
- Charge the battery fully before each run.
- Use virtual walls on dark or glossy floors.
- Reset or delete the map in the app if your model supports mapping.
Maximize Cleaning Performance
A few smart habits help your robot work better.
Use Virtual Walls When Needed
Some iLife models support magnetic strips or infrared barriers to block off pet bowls or play areas.
Declutter Before Each Run
Pick up small items, cords, and loose clothing. Clutter stops the robot and shortens cleaning time.
Let the Robot Learn Your Home
Run it on bare floors first so it can map your space before tackling rugs or carpet.
Clean on Auto Mode Daily
Set a morning or evening schedule. Daily runs prevent dust buildup and reduce deep-cleaning chores.
Care and Storage Best Practices
Proper care extends the life of your robot.
Store the Robot Properly
- Keep the robot docked when not in use.
- Store in a dry, room-temperature area.
- Avoid direct sunlight and damp basements.
Replace Parts on Schedule
- Main brush: Every 6 to 12 months.
- Side brushes: Every 3 to 6 months.
- Filter: Every 2 to 3 months.
- Battery: Every 1 to 2 years with daily use. Replace with an OEM part.
Update the Firmware
Check the iLife app regularly for firmware updates. They improve navigation, battery life, and app stability.
Frequently Asked Questions About iLife Robot Vacuums
How long does an iLife robot vacuum take to charge?
Most iLife models take about 3 to 4 hours to reach a full charge from empty.
Can I use an iLife robot vacuum on carpet?
Yes, iLife robots work on low-pile rugs and thin carpet. They perform best on hard floors like tile, hardwood, and laminate.
Do I need Wi-Fi to use my iLife robot?
No. You can operate any iLife robot using the buttons on the unit or the included remote. Wi-Fi is only required for app control and scheduling through your phone.
Why does my iLife robot stop in the middle of cleaning?
The robot may stop due to a low battery, a full dustbin, tangled brushes, or dirty cliff sensors. Charge, empty, and clean the unit, then restart it.
How often should I empty the dustbin?
Empty the dustbin after every cleaning session to keep suction strong and prevent clogs.
Can an iLife robot vacuum fall down stairs?
No. The cliff sensors under the front bumper detect drops and redirect the robot away from edges. Keep the sensors clean for accurate detection.
Key Takeaways for Using Your iLife Robot Vacuum
Your iLife robot vacuum is designed to make cleaning effortless once you set it up correctly. Start with a full charge, dock it in an open area, and pair it with the remote or app. Empty the dustbin after every run, clean the brushes weekly, and wipe the sensors to prevent navigation errors. Schedule daily Auto cleanings to keep dust under control without extra effort. With consistent care, your iLife robot will keep your floors spotless for years. Press “Auto” today and let your robot take over the chore.


