
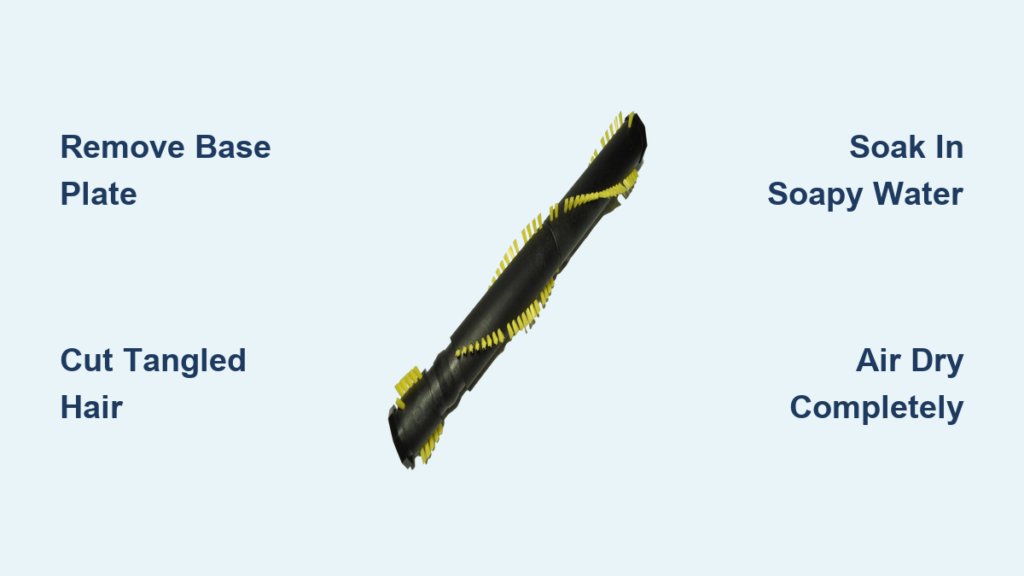
If your Eureka vacuum leaves debris behind or feels weaker than usual, a dirty brush roll is often to blame. Hair, threads, and dust build up around the roller over time, slowing its spin and reducing suction. Knowing how to clean a Eureka vacuum brush roll the right way restores pickup power, prevents motor strain, and extends the life of your machine. The good news is that you only need basic household tools and about 15 to 20 minutes to complete the job.
This guide covers everything from removing the base plate to deep cleaning the bristles, inspecting for wear, and reinstalling the roller correctly. You will also learn simple maintenance habits that keep your vacuum running at its best between deep cleans.
Gather Your Tools and Prepare the Workspace
A little preparation makes the entire process smoother and safer.
What You Need Before Starting
Collect these items so you are not searching mid-task:
- Phillips-head screwdriver
- Scissors or a seam ripper
- Old toothbrush or small scrub brush
- Mild dish soap
- Clean towel or microfiber cloth
- Phone camera (optional, for reassembly reference)
Power Down and Unplug First
Safety comes first. Unplug corded models and remove the battery from cordless vacuums. This step prevents accidental startup while your hands are near the brush housing.
Remove the Vacuum Base Plate
The base plate covers the brush roll and belt assembly. Removing it gives you full access for cleaning.
Flip the Vacuum on a Flat Surface
Turn the vacuum upside down on a carpet or towel to avoid scratching the body. Locate the screws on the underside that hold the base plate in place. Most Eureka models use 2 to 4 Phillips screws.
Unscrew and Lift the Plate Off
Remove each screw and set them in a small container so they do not roll away. Gently lift the base plate. If it feels stuck, check for hidden tabs or clips before prying.
Pro Tip: Snap a quick photo of the screw layout and belt position before you remove anything. It makes reassembly much easier.
Clear Debris from the Brush Roll Ends

Before removing the roller, clear away surface buildup. This step saves time during deep cleaning.
Cut Away Tangled Hair and Thread
Hair and string tend to wrap tightly around the end caps. Use scissors to slice through the fibers, then pull them away in sections. Work slowly to avoid snipping the bristles.
Spin the Roller by Hand
Give the brush roll a light spin. It should rotate smoothly. Any resistance or grinding means debris is still caught or the bearings may be worn.
Take Out the Brush Roll
Now remove the roller for a full cleaning.
Slide Off the Drive Belt
Gently stretch the rubber belt off the brush roll. Do not force it, since old belts can snap easily. If the belt looks cracked or stretched, set it aside for replacement.
Lift the Roller Out of the Housing
Pull the brush roll straight up and out. Some models have small side clips or brackets that need to be released first. Check your user manual if the roller feels stuck.
Note: If the roller resists, stop and look for hidden screws or belt loops that may still be holding it in place.
Deep Clean the Brush Roll
A proper wash removes grime that brushing alone cannot reach.
Soak in Warm Soapy Water
Fill a sink with warm water and a few drops of mild dish soap. Submerge the brush roll for 5 to 10 minutes. This loosens dust, pet hair, and sticky residue from the bristles.
Do not soak motorized brush rolls or battery-powered rollers. Only non-electric rollers can handle water.
Scrub Between the Bristles
Use an old toothbrush to scrub along the roller, working around each bristle row. Pay extra attention to areas with caked-on debris or pet fur.
Rinse and Air Dry Completely
Rinse the brush roll under clean running water until the water runs clear. Shake off the excess and place it flat on a towel to dry for at least 24 hours. A damp roller can cause mold or rust inside the vacuum.
Pro Tip: Set the brush roll near a fan or in a sunny window to speed drying.
Inspect the Brush Roll for Damage
Cleaning is the perfect time to check for wear. A damaged roller can hurt performance even when clean.
Look for Worn or Melted Bristles
Compare bristle length to new ones if possible. Bald patches or melted tips are signs the roller needs replacing.
Check the Bearings and End Caps
Spin the ends of the roller with your fingers. Smooth rotation is good. Wobble, grinding, or squeaking means the bearings are failing and the roller should be replaced.
Match the Roller to Your Model
Brush rolls are not universal. Check your model number (such as the Eureka AirSpeed AS1000A) and confirm the replacement part matches before buying a new one.
Rule of Thumb: Replace brush rolls every 6 to 12 months if you vacuum weekly.
Reinstall the Brush Roll
Once clean and dry, put the roller back into place.
Place the Roller Back in the Housing
Align the ends of the brush roll with the slots on each side. Press down gently until it sits flat in the housing.
Loop the Belt Around the Motor Pulley
Stretch the belt over the motor shaft first, then loop it around the brush roll. Make sure the belt is not twisted and sits centered in the groove.
Reattach the Base Plate
Position the base plate back over the roller. Insert each screw and tighten evenly. Confirm the plate sits flush with no gaps around the edges.
Warning: A misaligned belt wears out quickly and can snap during use, so double-check before you power on.
Test the Vacuum
Run a quick test to make sure everything works correctly.
Power On and Watch the Roller
Turn the vacuum on and look through the soleplate opening. The brush roll should spin quickly and smoothly without wobbling.
Listen for Odd Sounds
Grinding, thumping, or squealing noises usually mean the belt is misaligned or debris is still trapped inside.
Vacuum a Small Test Area
Run the vacuum over carpet and bare floor. Strong suction and visible debris pickup confirm the cleaning worked.
If the brush does not spin: Turn off the vacuum, unplug it, and recheck belt tension and alignment.
Maintain Your Brush Roll Between Cleanings
A few simple habits reduce buildup and keep your vacuum working like new.
Clean the Roller Monthly
Plan to remove hair and fibers every 4 to 6 weeks. Homes with pets or long hair may need more frequent cleanings.
Empty the Dustbin Often
A full bin reduces airflow, which makes the motor work harder and generates more heat near the brush deck.
Skip Wet Messes
Never vacuum liquids or damp surfaces. Moisture damages the roller and encourages mold growth inside the vacuum.
Pro Tip: Run a lint roller over the brush between deep cleans to pull off surface hair in seconds.
Frequently Asked Questions About Cleaning a Eureka Vacuum Brush Roll
Can I use water to clean a Eureka brush roll?
Yes, but only for non-motorized brush rolls. Submerge the roller in warm soapy water for 5 to 10 minutes, then rinse and let it air dry for at least 24 hours before reinstalling.
How often should I clean the brush roll?
Clean it every 4 to 6 weeks with normal use. Vacuuming pet hair or long human hair may require monthly or even biweekly cleaning.
Why does my Eureka brush roll stop spinning?
Common causes include tangled hair around the ends, a broken or stretched belt, or worn bearings. Remove debris, check the belt tension, and inspect the roller for damage.
When should I replace the brush roll instead of cleaning it?
Replace the roller if bristles are worn down by half, the bearings grind or wobble, or the belt keeps slipping even after correct installation. Most rollers last 6 to 12 months.
Can I use a sharp blade to cut hair off the brush roll?
Scissors or a seam ripper work best. Avoid box cutters or razor blades, which can slice the bristles or scratch the roller surface.
Is it safe to soak the brush roll in bleach or strong cleaners?
No. Harsh chemicals can damage the bristles and plastic core. Stick with mild dish soap and warm water for safe, effective cleaning.
Key Takeaways for Cleaning a Eureka Vacuum Brush Roll
Learning how to clean a Eureka vacuum brush roll is one of the easiest ways to boost suction and extend the life of your vacuum. Focus on removing hair from the end caps, deep cleaning the bristles in soapy water, and drying the roller completely before reassembly. Inspect the belt and bearings each time you clean, and replace parts that show wear.
Set a reminder to repeat this process every month or two, especially in homes with pets. A few minutes of routine care now prevents costly repairs and keeps your floors spotless every time you vacuum.


