
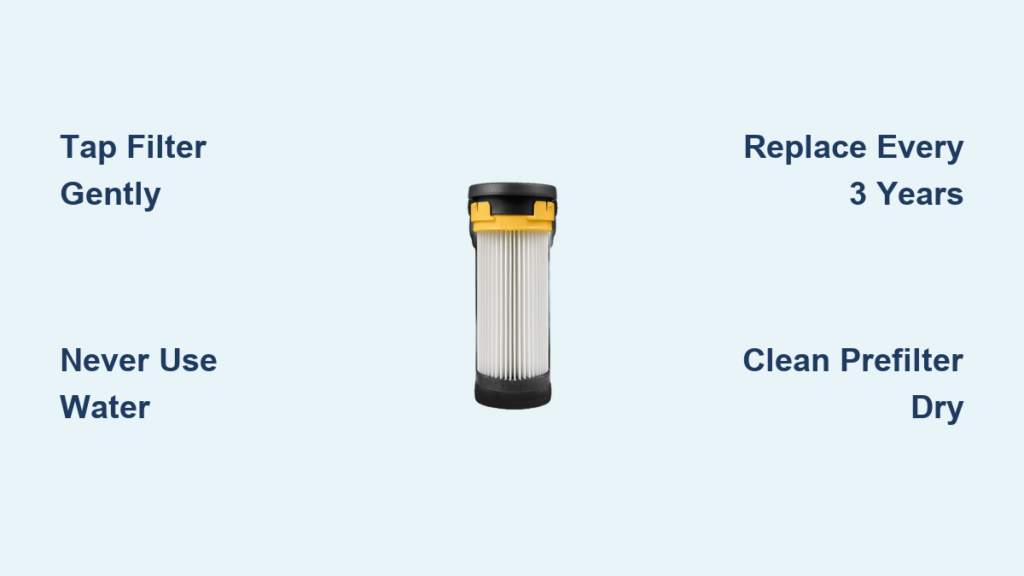
If your Miele vacuum has lost its strong suction or leaves dust behind, a clogged filter is often the hidden cause. Miele vacuums rely on a multi-stage filtration system, including the fine dust filter, prefilter, exhaust filter, and motor protection filter, to trap allergens and protect internal parts. When any of these components get dirty, airflow drops and cleaning performance suffers quickly. Learning how to clean Miele vacuum filter parts the right way can restore suction, extend motor life, and keep your home’s air genuinely clean.
This guide walks you through each filter type, explains which ones you can clean and which you should never touch with water, and shares model-specific tips for Triflex and bagged Miele vacuums.
Locate and Remove the Fine Dust Filter Safely
The fine dust filter plays the biggest role in capturing microscopic particles, so it needs regular attention.
Find the Filter on Your Model
On HX1 Triflex models, the fine dust filter sits inside the dust container. Empty the container over a trash can first, then access the filter. On bagged models, the fine dust filter attaches to the locked prefilter. You must remove the prefilter first before you can reach the fine dust filter.
Remove the Filter Step by Step
For HX1 Facelift and HX2 Triflex models, twist the fine dust filter clockwise using the recessed grip areas. A slight operating noise is normal and signals the ComfortClean function working correctly.
For bagged models, gently remove and reinsert the fine dust filter several times if it feels stuck. This loosens it without forcing the material. You can apply slight force, but never pry with sharp tools that could tear the delicate media.
If the filter still won’t budge after several attempts, contact Miele Service for help rather than risk damage.
Clean the Fine Dust Filter Without Damaging It
The fine dust filter is the most sensitive component in your vacuum, and what you don’t do matters just as much as what you do.
Never Wash or Brush the Filter
Do not clean the fine dust filter with water, especially on HX1 Facelift and HX2 Triflex models. Water damages the microfiber material and reduces filtration efficiency. Avoid brushing the surface and never use sharp or pointed objects. These actions can tear the filter media and let fine particles escape back into the air.
Do not clean the inside of the filter, as this can compromise its structure over time.
Tap Gently to Remove Dust
The safest method is to hold the filter over a trash can and tap it lightly to dislodge loose dust. This quick motion removes surface debris without stressing the material. If the filter looks heavily soiled, discolored, or physically damaged, replacement is the better option.
Reinstall and Replace on Schedule
After cleaning, reinsert the fine dust filter into the prefilter and press the round cap down until it clicks into place. Make sure it seats fully to prevent air leaks that reduce suction.
Miele recommends replacing the HX FSF-2 fine dust filter every three years to keep performance consistent. Even with regular tapping, the material degrades over time.
Maintain the Prefilter the Right Way
The prefilter shields the fine dust filter and motor from larger debris, so it needs occasional care too.
Clean with Dry Tools Only
For HX1 Facelift and HX2 models, do not use water on the prefilter. Use the dust brush that came with your vacuum or a dry cloth to wipe away dust. For other models, a fine cleaning brush works well for reaching inside.
Never use liquid dish soap or pointed tools that could puncture the material. Both can damage the prefilter and reduce its effectiveness.
Remove the Motor Protection Filter for Better Access
You can remove the motor protection filter to reach the inside of the prefilter more thoroughly. The motor protection filter does not need routine cleaning, so this is a safe step. Just remember to reinstall both filters correctly afterward. A misaligned prefilter lets unfiltered air bypass the system, straining the motor.
Replace Exhaust Filters on the Correct Schedule

Miele offers several exhaust filter types, each with its own replacement timeline. Using the wrong schedule reduces suction and shortens motor life.
Match the Filter to Your Model
Miele’s main exhaust filter options include:
• AirClean: Replace with every new packet of FilterBags (one filter per packet, four per multipack)
• AirClean Plus 50 (light blue): Replace yearly
• Silence, Active, or HEPA AirClean 50 (gray, black, or white): Replace when the timestrip® indicator turns completely red
For older C1 and S-series models, use the 30-size filters (Active AirClean 30 or HEPA AirClean 30). The timestrip® lights up after about 50 hours of use, roughly one year of average vacuuming.
Follow the Correct Replacement Steps
For AirClean filters:
1. Press the release catch and open the filter grille
2. Grip a clean, unsoiled edge of the used filter and pull it out
3. Insert the new filter and close the grille until it clicks
For AirClean Plus, Silence, Active, and HEPA 50 filters:
1. Lift the old filter out
2. Insert the new filter fully and press down
3. Press the timestrip® indicator to reset it after installation
Never stack more than one exhaust filter at a time. This restricts airflow and overworks the motor.
Handle the Motor Protection Filter Correctly
The motor protection filter does not need routine cleaning. Its job is to trap fine particles before they reach the motor, and it should be replaced as needed, typically during FilterBag changes.
If the motor protection filter looks clogged or discolored, swap it for a new one. A blocked filter reduces suction and makes the motor run hotter, which shortens the vacuum’s lifespan. Always choose genuine Miele replacement parts for a proper fit and reliable filtration.
Replace FilterBags Without Spilling Dust
Bagged Miele models depend on a properly seated FilterBag for clean, efficient operation. A loose or reused bag drops suction fast and can let dust escape into the motor housing.
Follow the Safe Removal Process
- Switch the vacuum off using the On/Off footswitch and unplug it
- Press the release buttons on the hose connector and pull the hose out
- Lift the dust compartment lid, which automatically closes the FilterBag flap to keep dust contained
- Pull the used FilterBag out by the grip on the holder
- Insert the new FilterBag until it clicks into place
- Leave the bag folded until installation to avoid premature dust exposure
Avoid Lid Closure Mistakes
Never force the dust compartment lid closed. If it won’t shut, check that the FilterBag is fully inserted and not trapped. The empty operation lock is a safety feature that prevents closure without a bag in place. Forcing the lid can break the locking mechanism or cause dust leaks inside the vacuum.
Always confirm the lid clicks securely before restarting the vacuum.
Clear Blockages That Mimic Filter Problems
Weak suction isn’t always a filter issue. Blocked airways can produce the same symptoms and should be ruled out before replacing parts.
Disassemble and Check Each Section
If the vacuum feels hot or airflow is weak:
1. Disconnect the floorhead, wand, and hose
2. Use a broom handle to push debris gently toward the floorhead
3. Shake out the hose to dislodge clogs
Avoid vacuuming bulky items like large leaves or paper towels. These can jam the system and force you to disassemble components for clearing.
Check Filters First When Suction Drops
Before assuming a mechanical issue, inspect:
• Is the FilterBag full?
• Are the exhaust or motor protection filters clogged?
• Is the prefilter dirty?
Replace or clean components as needed. Ignoring clogged filters lowers cleaning efficiency and increases motor strain over time.
Wash the Triflex Dust Container Safely
For HX1, HX1 Facelift, and HX2 Triflex models, the dust container is the only part designed for wet cleaning.
Clean and Dry Before Reassembling
Empty the container over a trash can, then wash the interior with water and mild liquid dish soap. Rinse thoroughly and dry completely before putting it back on the vacuum. A damp container can damage filters or encourage mold growth.
Never submerge the motor housing or electronic components. Only the dust bin is washable.
Keep the Turbobrush and Electrobrush Clear
Hair and thread buildup on the roller brush can drop cleaning performance and strain the motor. A quick monthly check prevents most issues.
Remove Hair and Debris
- Switch the vacuum off and unplug it
- Detach the electrobrush and place it upside down on a flat surface
- Cut along the guide track with scissors to slice through tangled hair
- Reattach the brush and run the vacuum to suction up the loose debris
For deep cleaning, unlock the side flap until the symbol shows, remove the roller brush, clear stubborn dirt inside, then reinsert and lock the flap.
Adjust the Air Inlet for Your Floor Type
On STB 305 TurboTeQ, open the valve by turning the large brush symbol to the circle for high-pile carpets. Close it by turning the small brush symbol to the circle for hard floors. On STB 201/205, slide the line marking to the large or small brush symbol as needed.
Keep the valve closed for everything except thick carpets to preserve full suction.
Follow a Consistent Maintenance Schedule
Sticking to a regular schedule keeps your Miele vacuum performing at its best and prevents unexpected breakdowns.
| Component | Frequency |
|---|---|
| Fine dust filter (HX1 Triflex) | Tap clean monthly |
| Fine dust filter (HX1 Facelift/HX2) | Replace every 3 years (HX FSF-2) |
| Prefilter | Clean as needed with dry tools |
| FilterBag | Replace when full; never reuse |
| AirClean exhaust filter | With every new FilterBag packet |
| AirClean Plus 50 | Replace yearly |
| Silence/Active/HEPA 50 | When timestrip® is fully red |
| Motor protection filter | Replace as needed |
| Dust container (Triflex) | Wash with soap and water as needed |
Frequently Asked Questions About Miele Vacuum Filter Cleaning
Can I wash my Miele fine dust filter with water?
No. Miele specifically warns against washing the fine dust filter with water, especially on HX1 Facelift and HX2 Triflex models. Water damages the microfiber material and lowers filtration efficiency. Tap the filter gently over a trash can instead.
How often should I replace the Miele exhaust filter?
It depends on the filter type. Replace AirClean filters with every new packet of FilterBags, AirClean Plus 50 filters yearly, and Silence, Active, or HEPA AirClean 50 filters when the timestrip® indicator turns fully red (about 50 hours or one year of use).
Why is my Miele vacuum losing suction even after cleaning the filters?
Check for a full FilterBag, clogged motor protection filter, or a blockage in the hose, wand, or floorhead. Disassemble the airflow path and push debris toward the floorhead with a broom handle to clear obstructions.
Can I reuse Miele FilterBags?
No. Miele strongly advises against reusing FilterBags. Blocked pores in a used bag reduce suction and can let dust escape into the motor housing, causing long-term damage.
What should I do if the fine dust filter is stuck and won’t come out?
Remove and reinsert the filter several times to loosen it. You can apply slight force while turning, but never use sharp tools. If the filter still won’t move, contact Miele Service for professional help.
Is the prefilter washable on any Miele model?
No. Miele warns against washing the prefilter with water on HX1 Facelift and HX2 models. Use the included dust brush or a dry cloth instead. Never use liquid dish soap or pointed tools that could damage the material.
Key Takeaways for Cleaning Your Miele Vacuum Filter
Proper filter care is the foundation of strong suction, clean air, and a long-lasting Miele vacuum. Always tap clean the fine dust filter monthly and replace it every three years using the HX FSF-2 model. Keep the prefilter dry and brush it as needed, and replace exhaust filters according to their specific type and schedule.
Use only genuine Miele parts, follow the model-specific instructions in this guide, and never use water on filters that aren’t designed for it. When your vacuum is well maintained, it cleans better, protects your indoor air quality, and delivers reliable performance for years. For tricky issues or stubborn parts, Miele’s official videos and Service team are always the best next step.


